SyntaxHighlighter

Friday 28 June 2013

Day 15: Rebuilding the AR program for VS 2010 and XNA 4.0

Troubleshooting notes

As per installation guide, install both VS C++ and C# Express 2010, install XNAGS40, OpenCV, ALVAR.

Open "GoblinXNAv4.1/wrappers/ALVARWrapper2.0/ALVARWrapper2.0.sln" with VS C++ Express 2010.

right click solution, change configuration from debug to release, build

ERROR: cannot include MarkerTracker.h
SOLUTION: 
  1. enable expert settings (tools, settings, expert settings)
  2. right click solution, properties
  3. Fix path to "(ALVAR install)/include" under C/C++ -> "Additional Include Directories" 
  4. Fix path to "(ALVAR install)/bin" under Linker -> General -> "Additional Library Directories"
now it builds

Copy generated ALVARWrapper.dll to GoblinXNAv4.1/dlls/unmanaged/

Follow rest of instructions in installation guide

Complete extra step with opencv 2.1 for VS 2008. Copy dlls.

Don't forget to build GoblinXNA4.1/src and the tutorials

Build skinnedmodelprocessor and pipeline and all that stuff too.

ERROR: SkinnedModelPipeline not found
SOLUTION: must download new skinned sample compatible with XNA 4 from here: http://xbox.create.msdn.com/en-US/education/catalog/sample/skinned_model

Change config to release if possible, build all of them in turn, SkinnedModel, SkinnedModelWindows, and SkinnedModelPipeline

Delete existing reference to SkinnedModelPipeline, and add a new reference, go to GoblinXNAv4.1/bin/x86/SkinnedModelPipeline.dll and re-add it. Same for GoblinXNA reference and any reference it can't find.

various other errors inbetween are self explanatory to fix

ERROR: unable to load ALVARWrapper.dll the specified module cannot be found
SOLUTION:
open  \src\device\vision\alvardllbridge.cs and change ALVARWrapper.dll to full file path
then rebuild GoblinXNA


Current state:

It builds, window appears, blue screen. No graphics on window at all.
Still debugging

Conclusion of the day

I found the original Goblin XNA tutorial and reinstalled everything with the new software. Then I began porting all of the AR code to the new software, rewriting methods that didn't work any more and copying examples of new methods from the new version 4.0 tutorial example files.

I had imagined it would be a quick job but XNA is an extremely quirky application with ALVAR and Goblin and OpenCV and all sorts of references flying about it has taken around 3 days. On the plus side all of this troubleshooting has really helped my understanding of how the code actually works, and exactly how ALVAR, ALVAR wrappers, Visual Studio and Goblin XNA all work together and where each of them fits in. This will definitely help any future code modifications and porting.

Progress has been good slow but steady, almost got it working. All build errors have been fixed, some models had to be temporarily deactivated because they weren't supported (we lost the orchid and the funny green minecraft creature may not be working properly) but I can have a look at fixing those later. Currently the project builds and runs without errors at all, but it does not display any video on the screen. I'm sure it's because I haven't completed some extra step that version 4.0 requires over 3.1, like initializing the camera or something.

Confirmed that the program grabs the webcam.

On Monday will finally finish this and finish our investigations into 123D Catch, and get back to preparing for Animation 13 in earnest.

Day 14: The new AR Demo

Setting up the PC's

Major operations on Katy, transplanted a new processor and RAM:

Installed 4GB of ram, apparently Katy already had 2GB of ECC RAM, and this new 4GB wasn't ECC (they can't be mixed) so now instead of 6GB total in Katy, we have 4GB in there and 2GB spare ECC RAM lying about.

Installed the Q6600 quad core CPU from Donald, Katy's original old E7300 dual core is now spare.

Installed Windows 7 64bit in Katy.

Installed the relevant software in Donald to get him up to date.

Currently installing everything on Katy.

Version Control System

I set up a private BitBucket repository to host the AR code and provide version control for up to 5 users (the free account has a 5 user limit on private repositories).

First commit, pushed the current version of the code to the repository git clone https://hamzamahmud@bitbucket.org/hamzamahmud/ar2013.git

Installed SourceTree on the Windows machines to manage the version control locally, pulling pushing branching cloning etc.

XNA 4.0 and Visual Express C# 2010

Found a tutorial on how to actually install Goblin XNA from scratch, the latest version is Goblin XNA 4.1, now following that tutorial. The original ARdemo version is Goblin XNA 3.5.
Installed the following software to get it to work:
Visual Studio C# Express 2010
Visual Studio C++ Express 2010
XNAGS40
NewtonWin
OpenCV 2.4.0
ALVAR 2.0.0

Took off the remaining 2 hours from Saturday... that's really it today!

Tomorrow I iron out the errors in the ne XNA build, and work on 123D Catch. Two tasks
1. get textures to export properly so the models made can be imported into GLC Player
2. try the model with the AR demo! Prerequisite is to get the new version of AR working on the upgraded softwares.

Wednesday 26 June 2013

Day 13: The future (of 3D vision techniques), today

123D Catch

Few important things happened today, firstly we tested 123D catch and did some pretty crazy stuff with it. It's a recent software developed by Autodesk that in essence allows anyone to upload a bunch of pictures of an object taken from all angles, and have a 3D model generated from those images automatically.

The processing is all done by uploading the images to the cloud, so you don't need a special computer - or any computer actually, you can even do it directly from your smartphone, tablet, etc which is pretty clever. This kind of stuff is what we were researching as part of the Advanced Computer Vision module earlier this year! Very enlightening to see a company has already made this ongoing research subject into a publicly available reality, so of course we just had to put it to the test. Actually we put it to the test because it sounds like an awesome demo to show off to the kids in Animation 13, but the first reason makes us look far more dedicated.

At the end of it you get a model that you can edit in the 123D catch program, or you can export it as an FBX, OBJ, etc to do stuff with it in other programs.

Attempt 1 was taking pictures of a model (me) in a swivel chair and swivelling after each photo. We did 20 photos indoors with flash against a gray background. The pics were of the head and a small amount of shoulders.

Result was terrible, the model received was garbage, we did a bit of troubleshooting and Toby discovered a few issues we hadn't realised: you aren't supposed to move the model, and you aren't supposed to use flash. Just goes to show we should sure as shooting go ahead and read the documentation before using the software next time. Welp! On we went..

Attempt 2 was taken outside, model (me again) sat in a chair and the camera Meister (Toby) moved around snapping shots at all angles with a lovely Canon SLR. We did one round from a highish angle and another quick round from a lower stance, total 39 photos.

Result was far better, it had the front of my face down very well, small mistakes but nothing significant and a very impressive result overall. The sides of my head and the back (basically all the bits that were overflowign with my long hair) were a problem for the software though, it didn't even have a mesh for the back because for all the pics with too much hair in them it couldn't find matching points (everything looks black-ish).

You can manually add matching points in the software after processing, and send the pics back for reprocessing, which turned out quite well but I still don't have a back of a head.

I think part of the problem is that the pics of the back of my head simply don't have enough interesting points as the entire view is taken up by my hair, so a possible solution is to zoom out in the pictures so we get some background as well as the back of my head, and take pictures with enough of the background overlapping in adjacent pics so that the software can match points in the background and work out whereabouts the camera is in relation to the model. That was a long sentence.

The position of the camera is calculated for every photo, so that should have significance in giving me a proper cranium.

What I plan to do now with 123D Catch is seeing how the models export, seeing how they work out in the AR demo, and getting the exported objects to load properly in GLC Player (and the AR program). Currently the OBJ export loads in GLC but the texture comes up completely scrambled.

Donald

I installed the new parts from Scan into Donald, and he now has a 6 core 3.5GHz monster of a CPU, 8GB of RAM, and a very impressive new 970FX motherboard. He's fast. Very.
Meet Donald... or something like that.


Out of the bargain we got a faulty P5N-E SLI motherboard, fully working 4GB of OCZ DDR2 RAM and a Q6600 quad core 2.6GHz CPU. The ram and CPU will likely be used to give Katy a boost - we don't like to waste good hardware and Katy really needs some more RAM after upgrading to Windows 7.

In fact, in order to make use of the extended RAM, I plan to reinstall Katy with the 64bit version of Windows 7, as the current 32bit version can only recognize 3GB. This wasn't an issue yesterday when we didn't know we were going to increase Katy's RAM, but obviously now that Katy is going to get about 6GB it's the obvious decision. At least now I know exactly how and what to install from the get go, to get Katy, Donald and the new Lenovo Z500 AR laptop all set up as fast as possible without wasting productive time.

AR demo with new software: XNA 4.0 and Visual Express C# 2010

I tested out the AR demo program on the newly installed updated software on Katy (XNA 4 and Visual Studio 2010), but unfortunately it didn't work straight out. However I'm confident it can be coaxed into being reasonable after a little effort. First it told me it needs to convert the current AR program to work with the new version of VS, claiming it's not backwards compatible. After allowing it to have its way with the precious code, when I attempted to compile it it threw an error telling me it can't find the skinningmodel or some such ridiculously childish claim, I plan to investigate further while Donald and Katy are being set up tomorrow.

If worst comes to the worst I will simply have to source out Visual Express 2008 and XNA 3.1 and just make do with the outdated software, but that is a last resort and to be honest I'm certain I can iron out the errors once I get cracking with it!

In other news I took 2 hours off work today to start making up for the extra hours spent last Saturday for the Open Day so there wasn't as much going on, but of course tomorrow productivity shall shoot up as expected with a good ol' 7-hour working day. I'll probably take the remaining two and a half hours off next Wednesday.

To the laboratory!


Oh and one last thing, I was checking the stats for this blog, and saw this amazosity:
It's me. I'm dead famous.
It's probably a glitch, but that many +1's is certainly nice to see!

Tuesday 25 June 2013

Day 12: Katy

Meet Katy

Downloaded all the drivers from the Dell website, downloaded installers for any useful-looking software, copied off all data we want to keep.... sure enough it's time to upgrade the old XP machine to Windows 7. Of course such a faithful vessel requires a new name to go with the new look, so say hello to Katy!

Katy started off as a simple Dell Workstation T3400 (standard issue University fare) with an E7300 at 2.66GHz, 2GB of RAM, no graphics or motherboard or anything interesting to speak of. But at some point Katy got bumped up with a new PSU and a legendary 8800GTX GPU (fastest card known to man when released in 2006, and maintaining that title for over a year) providing graphical prowess and dual video output ports with which to connect to a big TV for the AR. The new PSU was actually a necessity, because the power draw of the 8800GTX is far too much to think about (most power hungry card known to man when released in 2006, and maintaining that title till today).

I couldn't update the actual AR code and test it until Katy was ready for action, so I spent the time preparing and researching: downloading 3DS Max, preparing a USB drive for a 64bit install of Win 7 (for Donald and the new AR laptop), and researching sound, GUI's etc alongside installing everything on Katy - plus getting 123D Catch.

Used 32 bit Win 7 for Katy, 64 bit wasn't ready and isn't really necessary with 2GB of RAM.

Installed the following and copied the ARdemo code over.
  • ALVAR
  • Autodesk 3ds Max 2013
  • MS Office
  • Blender
  • MS Visual Studio Express 2012
  • MS Visual Studio Express 2010 (after realising XNA 4 doesn't support 2012.. duh)
  • XNA 4.0
  • OpenCV
  • 123D Catch
  • All the drivers and stuff

Sound in XNA 4

After some research, I found that in the new version of XNA sounds are managed in a very simple "load and play" manner similar to textures. This would be large improvement over the current (somewhat cumbersome) method that is being employed.

For this reason Katy will get XNA framework 4.0 (the latest version before it was discontinued) which also requires Visual C# Express 2010. The version the AR demo currently runs on is 3.1 with Visual C# Express 2008.

I presume the code will work fine on the new software, but of course I will test the functionality once it is up and running.

Method for using sounds in XNA 4.0:
  1. Load sound file into Content as normal (add -> existing item)
  2. Change its properties to use "SoundEffect - XNA Framework" content processor
  3. Declare SoundEffect variable corresponding to the sound (global variable somewhere above)
  4. Initialize in LoadContent(): Content.Load("soundname")
  5. To play it use soundname.Play();
Using a raw SoundEffect as listed here means that you can't actually do much with it except play the whole thing (and set volume, distance and doppler effects etc). Not useful if we want to do more advanced stuff like stopping playback if the model disappears or managing the playing and pausing and playing of a longer sound file for background music or something.

So we make a SoundEffectInstance which can be played, paused, resumed and stopped. You can apply panning and pitch and a 3D position, as well as adjust volume etc. The instance is created from a SoundEffect using SoundEffect.CreateInstance()

Plan at the moment:
  1. When guitar model is displayed, start playing guitar music. If it's gone for long enough stop playing.
  2. When spaceship flying through hoop model is displayed, start fire sound effect. Stop when its gone. Perhaps have engine noises.
  3. ..?
From there we can add interactive features, like changing tunes on the guitar from a keypress, etc.

Will also allow adjustment via the GUI.

New dynamic models need to be done too.

123D Catch

Autodesk's new software that allows a 3D model to be generated from images of a static object taken by a camera that rotates about it. I installed this on Katy after Windows 7 and everything else was all done.

Anyway, full testing of 123D catch shall be done asap. The current idea is, if it works quickly and easily great, if it doesn't then sack it in favour of more pressing things.

Donald

All the parts arrived and the unboxing commences! Today I was about to tear out the hard drive from old Donald to save some data, thought I'd hit the Power switch just for the sake of it, and was subsequently completely dumbfounded when it started up like nothing was wrong. Yep, after being lifeless for so long Donald just decides he's up for it and turns himself on without a care in the world, such nerve...

No issue though, I copied 160GB of data off Donald's drive onto a lovely new 1TB external USB 3 disk to ensure no important data is lost off Donald. That includes ALL user files, and everything off the secondary partition (which seems to be 60GB of pictures of hands).

Tomorrow I'll perform the transplant and Donald should have a new processor motherboard and RAM, Katy will get about 4GB (or was it 2?) extra RAM, and as a result of it all we will have:
  1. a fully working Core 2 Quad Q6600 processor
  2. a pretty valuable large Thermaltake CPU cooler, and
  3. a not so fully working P5N-E SLI motherboard.
The processor and cooler can actually be transplanted into Katy if Toby so desires. Katy currently has a Dual core 2.6GHz, Donald's CPU that will be spare is a Quad Core 2.6GHz from exactly the same generation so it will be some improvement if not massive.

Z500

New AR laptop has hopefully been ordered today, it will come with Windows 8 pre-installed so I'm planning to dual boot Windows 7 on it. Although there is a good chance that the software we need for AR will still actually work on Windows 8, as they are very similar operating systems at the core so I'll discuss this with Toby later on (i.e. the reasons for sticking with Windows 7 and whether we actually need to). To be perfectly honest there is bound to be some important software that doesn't support the new OS, so in preparation here is the method of completing the dual boot:

Monday 24 June 2013

Day 11: Consolidating everything so far and pressing on!

Diving into Animation 13

Open Day is now over (was fun!) and we have set our sights on the next milestone: a demonstration at Animation 13 on the 12th of July. That gives us 3 weeks precisely, with the demo landing on the Friday of the 3rd week. Stuff will need to be done by then.

Donald's parts seem to have gotten lost somewhere in the loop so a little investigation is underway, as they certainly should have arrived by now.

The XP machine is set back up in the AIG lab after we moved everything for the Open Day, and one of the imminent tasks this week is to upgrade this PC to Windows 7. Speaking of tasks, here's a current lowdown of some of the pending tasks in no particular order:

Adding stuff to the AR demo

Adding sound, new static and dynamic models, investigating inbuilt model animations so that models can be even more impressively dynamic, adding voice recognition.

Useful link for activating inbuilt model animations (method used is to export the models and their animations from Blender (free graphics program) with specific settings that are suitable for XNA):

General tasks

Upgrade the XP PC to Windows 7 after first checking it for any useful data we don't want to lose.

Documenting the entire AR demo program

Building a GUI to do everything

Automating model addition so that everything can be done quickly and from a single GUI, and generating new modelsets automatically so that all new models can be switched to on the fly as soon as they are added.


System for making 3D models of children's heads at Animation 13. Using the above two tasks, an fbx model generated from this system could then be added to the AR program quickly and easily, allowing users to interact with their heads so to speak.

Less important ramblings

Continuing survey of state-of-the-art AR technologies, installing and trying them out.

Moving the entire demo to a new programming environment (XNA is outdated).

Porting the existing AR code to Mac. Google "monodevelop xna mac". Useful link to research when I work on this: http://www.facepuncher.com/blogs/10parameters/?p=32

Win 7 Laptop, the final rundown

Remember that laptop that wouldn't run ARdemo? Well it still won't.

Tried reinstalling all the related software, fully installed the Logitech webcam with its drivers, set the correct config settings, uninstalled the inbuilt webcam of the laptop, still doesn't work.

Symptoms: opens LowryDemo process (aka the augmented reality demo), nothing appears to happen, process ends.

Andy mentioned the problem was either the webcam or the graphics drivers, I ruled out the webcam via extensive testing. Tried debugging in VStudio, it runs without errors and warnings, the code builds, it starts up and then it ends - almost like it's been programmed to end. It doesn't even get to any of the main code. I can ascertain it gets to the initial stages of game.run() but have no idea where it jumps to from there. Presumably some initialization code inside the XNA framework itself from whence it never returns.

Conclusion: proooooobably the graphics.

Decision: buy a new laptop around £650 that is future proof and has decent graphics!

Outcome: Spent a while researching suitable notebooks, right now just waiting to see if finance will agree to buy from saveonlaptops.co.uk (very well priced notebooks, the one that caught my eye cost £50 more from other vendors). Current selection includes:
Lenovo Z500 touch £675: http://www.saveonlaptops.co.uk/Lenovo_Z500_Touch_1357423.html
(touch screen, best performance, looks sleek)

Acer Ultra M5 £650: http://www.saveonlaptops.co.uk/Acer_Aspire_Timeline_Ultra_M5-581TG_1316370.html
(has an SSD - superfast hard drive reads and writes for snappy use and quick boot times)

Asus N56VM £630: http://www.saveonlaptops.co.uk/ASUS_N56VM-S4089V_1360141.html
(bit older but best screen resolution 1920x1080 compared to 1366x768 of the other two, bit lower performance)

All are solid choices. As a reference they are very high performance, able to run recent DX11 games at good framerates at native resolution so are more than suitable for any 3D work.

Sound

Got sound running, Andy had some code that imported and ran some sound files and it works OK. XNA is using its own formats to store and manage the sound, but according to MSDN you can generate your own sound files from the .wav format, or even just feed in .wav sounds via a SoundEffect object. 

You can play and pause sounds, get them to play on events, mess about with volumes and background music etc so there should be quite a playground to explore.

Following resource provides useful information: http://msdn.microsoft.com/en-us/library/bb203895(v=xnagamestudio.31).aspx

Also, I can implement keyboard controlled movement of models (like in games), which may be worth investigating to make the demo even more interactive?

Testing continues tomorrow.

Friday 21 June 2013

Day 10: Open day and an explanation of GolfBallDemo

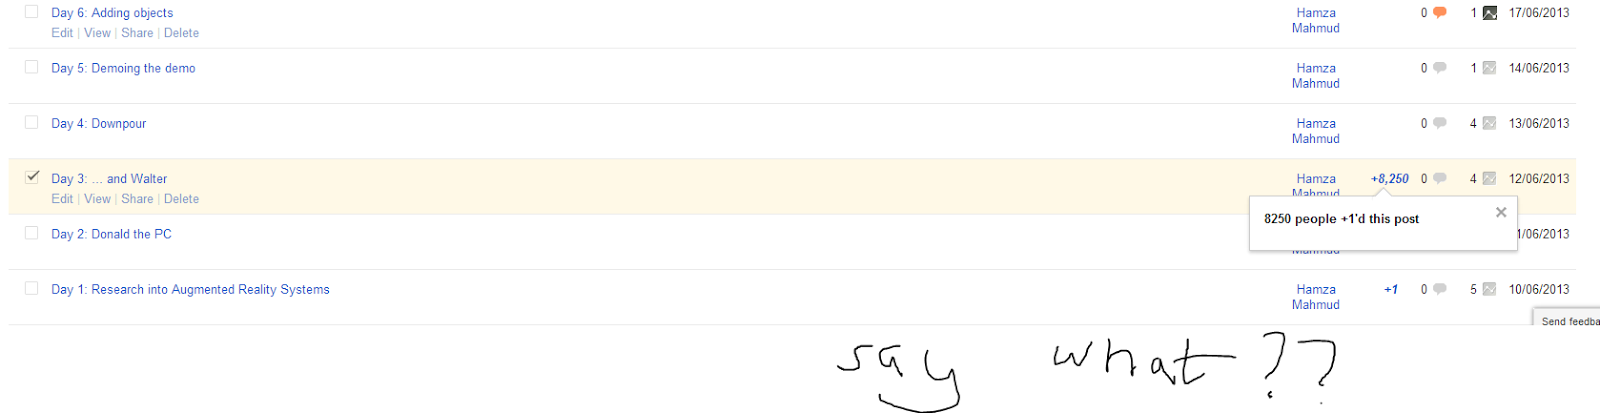
Random thoughts on open day

Open day wasn't as active as I expected, and the audience was a lot more mature than I anticipated - definitely a no-go on the war-themed models! Thanks for pointing that out Toby :)
For some reason I had a vision of a younger target group but it all worked out in the end.


What I did yesterday: my golf ball demo

The bouncing golf balls (where gravity could be adjusted) were probably the most popular demo, looking especially nice when the speed decreased to nothing and they just hung in mid-air! Then sloooowly started falling again.. So hopefully the many, many hours I took to code and debug that weren't a complete waste then. Here's a short description of the code for the bouncing golf balls demo.

The basic idea is a white diffuse platform acting as a base which is overlaid where the marker card appears, and upon this are a number of golf balls spaced about. The golfballs start off at random heights, they drop and are constantly bouncing vertically off the platform over time.

The main programming challenges in making this demo:
  1. There can be any number of golfballs on the scene at once, specified by the user
  2. Each golfball starts at its own random height that must be close to an average height specified by the user
  3. The platform can be of any size, X and Y dimensions individually specified by the user
  4. Golfball models must not clash, so must be spaced out over the platform without overlapping.
  5. Golfballs can only be placed on the platform itself and must not bounce on thin air around it.
  6. Golfballs must follow (or approximate) the laws of motion when bouncing.
  7. As a consequence of differing heights, there will likely be balls in all states of falling, rising, bouncing at any one time.
For simplicity's sake we assume that there are not too many golfballs on a platform too small to hold them (adding checks and error catching for this will be fairly simple in future if required)

This is some simple pseudo code describing my thought process:

  • Declare global variables for everything somewhere.
  • Make addGolfDemo which does the following:

Initializes marker and gets scaling info from config.txt for this demo, 
add this demo to the second model set to be enabled when the program switches to that set,
make the floor, rotate it so that it lies on the marker card, translate it so that it is centered on the centre of the marker card, add it to the scene graph
initialize an array of golfballs, calculate a peak height, a random position for each ball that does not overlap any other ball, and add them to the scene graph

  • update global transform nodes for ever single golf ball in the Draw() method: by updating height offset depending on where the ball is, if its falling, and its current height in such a way that the balls seem to rise and fall naturally over time (maximum speed at instant of bounce, speed slows to nothing at point where ball reaches peak height, accurate gradual speed change between those two points)
  • Add check for keypresses in the Update() method, to alter strength of gravity (affects the transform node updates in the Draw() method)

Global Variables


I used the following global variables which are all completely adjustable (and the demo will adapt to it):
  • the X and Y size of the playing field
  • the number of golf balls
  • array of TransformNodes (one node for every golfball - these is modified in the Draw method on every frame to update positions to make the golfballs look like they are moving and bouncing)
  • average height for any golf ball (the balls are randomly given a starting height within a certain margin above and below this average height)
  • array of floats, storing peak height of every golf ball (the bouncing is perfectly elastic, so golf balls reach their starting height on the peak every bounce)
  • array of floats, storing the height offset of every golf ball (where the exact position of that ball is at this point in time, offset from the peak height. Peak height - height offset = Translation vector component in the TransformNode)
  • array of Booleans, whether each golfball is falling or not (when its falling the height offset is increasing, when it is not falling the height offset is decreasing on every frame)
  • the strength of gravity
The strength of gravity can be adjusted in real time via keyboard input.

addGolfDemo() and the maths involved

The code for initializing the demo was placed in the addGolfDemo method:

 
        private void addGolfDemo()
        {
            int[] ids = new int[4];
            for (int i = 0; i < ids.Length; i++)
                ids[i] = i;
            modelConfig _modelConfig = new modelConfig();
            for (int i = 0; i < modelConfigArray.Length; i++)
            {
                if (modelConfigArray[i].name == "golf")
                    _modelConfig = modelConfigArray[i];
            }

            // So we can enable/disable this demo globally at any time
            TransformNode placer = new TransformNode();
            placer.Enabled = false;
            fireMarkerNode.AddChild(placer);
            modelSet2Nodes.Add(placer);

So this part is pretty much universal, lines 1 to 11 are identical in every addxyzDemo method, although the string in the comparison must match what is given in the config.txt file for this demo.

Lines 14 to 17 are common for every demo being added to the second model set, fireMarkerNode is the marker node of the model in the first model set that shares the same marker array.

Thereafter I created and placed the platform:

            // Do the floor and add it to the scene graph
            GeometryNode floor = new GeometryNode("Floor");
            floor.Model = new Box(new Vector3(Xsize, 3, Ysize));
            floor.Model.CastShadows = true;
            floor.Model.ReceiveShadows = true;

            Material floorMaterial = new Material();
            floorMaterial.Diffuse = new Vector4(1, 1, 1, 1);
            floorMaterial.Specular = Color.White.ToVector4();
            floorMaterial.SpecularPower = 10;

            floor.Material = floorMaterial;

            TransformNode floorTransform = new TransformNode();
            floorTransform.Translation = new Vector3(0, 0, 0);
            floorTransform.Rotation = Quaternion.CreateFromAxisAngle(new Vector3(1, 0, 0), MathHelper.ToRadians(90));

            placer.AddChild(floorTransform);
            floorTransform.AddChild(floor);

The size is set as specifed by the user, Xsize and Ysize (global variables) as seen on line 3. The next step was to initialize the golfballs:

            ModelLoader loader = new ModelLoader();
            Model[] golfModels = new Model[numGolfballs];
            GeometryNode[] golfNodes = new GeometryNode[numGolfballs];
            TransformNode[] golfPositions = new TransformNode[numGolfballs];
            golfTransNodes = new TransformNode[numGolfballs];

            golfHeights = new float[numGolfballs];
            golfHeightOffsets = new float[numGolfballs];

            falling = new Boolean[numGolfballs];

            for (int i = 0; i < golfNodes.Length; i++)
            {
                falling[i] = true;
                golfModels[i] = (Model)loader.Load("", "golfball");
                golfModels[i].UseInternalMaterials = true;
                golfModels[i].CastShadows = true;
                golfModels[i].ReceiveShadows = true;
                golfNodes[i] = new GeometryNode();
                golfPositions[i] = new TransformNode();
                golfTransNodes[i] = new TransformNode();
                golfNodes[i].Model = golfModels[i];
                golfPositions[i].Translation = new Vector3(0, 0, 3);
                //golfPositions[i].Scale = new Vector3(3f * _modelConfig.scale, 3f * _modelConfig.scale, 3f * _modelConfig.scale);

                // Randomly calculate height for each ball within +-10 of the average height
                golfHeights[i] = (((((float)random.NextDouble() * 2) - 1) * 10) + averageGolfHeight);
                golfHeightOffsets[i] = 1;

                // Randomly places each golfball onto the floor, without overlap
                float randX = ((float)random.NextDouble() * (Xsize / (numGolfballs + 2)));
                
                float a = ((i - (numGolfballs / 2)) * (Xsize / (numGolfballs + 2)));
                randX = a + randX;

                float randY = ((float)random.NextDouble() * Ysize);

                golfTransNodes[i].Translation = new Vector3(randX,  randY, golfHeights[i]);

                placer.AddChild(golfPositions[i]);
                golfPositions[i].AddChild(golfTransNodes[i]);
                golfTransNodes[i].AddChild(golfNodes[i]);
            }

Beautiful (ahem), as visible I went for efficiency over readability and basically did absolutely everything in one for loop.

The ModelLoader on line 1 loads the golfball model, then I create an array of Models for the number of balls I need. An array of GeometryNodes holds the golfball models, array golfPositions to move the golfballs to their initial starting X and Y position on the platform, array golfTransNodes which will be updated later on to make the golfballs move - basically updating the height of every golf ball.

golfHeights stores the peak and initial height, golfHeightOffsets stores the current offset of the golf balls from the peak height. At the moment that will be 0 (all balls start at their peak height).

The way I create a pseudo random distribution of golfballs that doesn't overlap is as follows, divide the length (X direction) of the entire platform into (numGolfballs+2) number of strips, and then limit the X placement of every golfball to one of those strips (except the first and last strip as  a buffer).

In this way, you will have the X component of every golfball spaced over the platform, so the Y component can be completely random. The reason we have two extra strips is so that there is some buffer region, we don't want golfballs bouncing right on the edge of the platform so there is a small area on both sides of the platform that that will be empty.

To place the golfballs on the X direction, we will use base + offset positioning. The base (variable a) is the X co ordinate of the start of that ball's strip. The offset (variable randX) is a random number that is of size minimum 0 to maximum the length of a strip.

Now the interesting maths that's going on (I love maths):

  • Line 27: height of each ball: (((((float)random.NextDouble() * 2) - 1) * 10) + averageGolfHeight) : this just calculates a random height for every golfball that is within 10 units above and below the average height (specified by user), not too complicated
  • Line 31: offset of each ball from its X strip: Xrand = ((float)random.NextDouble() * (Xsize / (numGolfballs + 2))) : The important bit is Xsize/ (numballs+2). As described above, the platform is divided into numballs+2 strips, and every ball is placed in a random X position in its strip. This number randX is the random X position in a strip. It is just a random number that is between 0 and the strip length.
  • Line 33: base position of the current ball's X strip: a = ((i - (numGolfballs / 2)) * (Xsize / (numGolfballs + 2))) : The first part (i - (numGolfballs / 2)) -> remember i is the loop index so will be 0, then 1, then 2, all the way upto numGolfBalls.  Therefore the first position this base points at will be what we want, it will be i - (half the number of allowed strips -> allowed = not the first and last strip that we want empty), times by the length of a strip. This correctly takes us through every single strip in turn.
  • Line 36: ((float)random.NextDouble() * Ysize); this simply gives a random Y position.
Well, next of course is the code in Draw() to make them bounce:

            // Make the golfballs bounce by updating their heightoffsets
            for (int i = 0; i < golfTransNodes.Length; i++)
            {
                if (falling[i])
                    if ((golfHeightOffsets[i] * (1+gravity)) > golfHeights[i])
                        falling[i] = false;
                    else golfHeightOffsets[i] = golfHeightOffsets[i] * (1+gravity);

                if (!falling[i])
                    if ((golfHeightOffsets[i] * (1-gravity)) < 1)
                        falling[i] = true;
                    else golfHeightOffsets[i] = golfHeightOffsets[i] * (1-gravity);

                golfTransNodes[i].Translation = new Vector3(golfTransNodes[i].Translation.X,
                                                            golfTransNodes[i].Translation.Y,
                                                            (golfHeights[i] - golfHeightOffsets[i]));
            }
In short: loop through the balls, if falling & if will not hit ground by next movement, perform next movement.
Else if will hit ground, set falling to false (the second for loop will move the ball upwards in this frame).

If not falling & if will overshoot max height by next movement set falling to true and do nothing this frame. Else if will not overshoot max height then decrease height offset.

I think this is an approximation rather than an exact rendition of the laws of motion but I didn't bother to confirm. For one thing it certainly looks realistic which is the effect I was going for in the end.

Full Documentation of the AR program

The basic structure of the AR demo (aka LowryDemo) program, just the names of the methods. This overview shows "where" the code to perform diffferent tasks exists.

    public class Game1 : Microsoft.Xna.Framework.Game
    {
        // Declare global variables

        public Game1() // Initialise graphics and content

        protected override void Initialize()

        private void CreateLights()
        private void SetupMarkerTracking()  
        private void SetupModelSets()
        private void CreateObjects() // and add to scene graph

        protected override void LoadContent()
        protected override void UnloadContent() // these two don't do much

        /// Update the fire effect on the ship and torus model       
        private void UpdateShipFire(Matrix worldTransform, List particleEffects)
        private void UpdateRingOfFire(Matrix worldTransform, List particleEffects)
        private Vector3 RandomPointOnCircle(Vector3 pos)

        private void toggleGraph() // enable/disable models
        private void setModels1() // switch model sets
        private void setModels2()
        protected override void Update(GameTime gameTime) // run on every tick
        protected override void Draw(GameTime gameTime) // run on every frame
    }

Next step is to explain the different methods and code sections in detail, and if Toby feels it is a good idea then I will manufacture a number of tutorials on how to perform different tasks (again, in detail) such as adding static objects, adding dynamic effects to static objects, implementing keypress detection and making functions for that, manipulating the scene graph, adding new model sets and so on. I presume basic documentation will be enough though, then we can focus on developing GUI's to do all these things and so on.

Tasks at the moment on the XNA code include investigating sound, finishing documentation, if possible testing object inbuilt animations, and developing a GUI to perform various activities visually and easily.

After that it'll be time to move the program to a more future proof programming environment. Exciting!

Thursday 20 June 2013

Day 9: Finishing adding models, implementing fun dynamic model interactions

ALVAR marker tracking

ALVAR just announced that they are releasing the latest version of their marker tracking software, which can  in fact track 2D and 3D objects in the real world! The fact that you won't need marker cards any more would be a massive improvement in interactivity over the current system, so it will be worth looking into this.

Would be interesting to have fireballs emanating from your hands, computerized hats follow your head about, and other random stuff.

Open Day Preparations

Tomorrow I'll be demoing the AR demo to a load of sixth formers who are thinking of applying to university. My job is to let them know that we do fun stuff in Computer Science (which, naturally, is super-easy because everything is fun in Computer Science) so today I finished off all the model-related problems in order to have a fully working and fun demonstration for schoolchildren to enjoy.

Some of the highlights include a high resolution spinning basketball suspended off the marker card. You can increase and decrease the spinning speed by hitting page up and page down, and because it's in mid air you can pose around it looking like you're holding it there with your mind or something. The force is strong with this one!

There's also a platform upon which a variable number of golf balls are randomly placed and bounce about. You can specify the number of golf balls and dimensions of the platform, and the system will randomly place the balls on the platform without collisions and without leaving the platform dimensions, and set them bouncing up and down. The gravity is also variable on the fly by using the up and down arrow keys. In its entirety, this took for ever to code...

There is also quite a range of static models, I do quite like the creepy insect:
Too close for comfort

Tomorrow I'll start looking at making GUI's to control the awesome interactive things, as well as adding sounds. The result will be a super-interactive megathon of augmented reality goodness, it's only a matter of time!

Wednesday 19 June 2013

Day 8: Improving the code, adding model sets

I added a bunch of code to manage the enabling/disabling the object sets, to make adding models simpler.

If you are adding a new demo onto an existing marker (i.e. under the second model set) you need to:

  1. Create the new addDemo method, using a placer node so that it can be enabled. Add this placer node to the appropriate arraylist of model set placer nodes (i.e. it'll be modelSet2Nodes as this demo is part of the second model set)
  2. modify addDemo method of object that originally used this marker, so that it uses a placer node that can be enabled disabled. Add the placer node to modelSet1Nodes.
  3. add call to new addDemo method inside CreateObjects()
  4. increase global variable numObjects by 1
  5. update config.txt with a new line for your new demo, bind it to the same marker as for the object using the existing marker.
Better instructions are on the way.

Today I basically added and refined a bunch of models into two sets that can be switched on the fly. In this way 10 marker cards can effectively show 20 models.

XNA is very picky about models. It doesn't accept anything other than .fbx or .x (rejects other formats as it doesn't have the correct content processor), and even with fbx models it is pretty hit and miss. Randomly it returns errors of access violation (although the models run fine when accessed on a different computer by 3ds max), or it won't apply textures, or all sorts of stuff.

Tomorrow I'll be looking at sound, should be interesting!

Tuesday 18 June 2013

Day 7: Animated Models, multiple model sets

Animated models

It turned out to be nigh on impossible to get freely downloaded models to exhibit their inbuilt animations with XNA.

Having models move about or rotate or grow/shrink by using the scene graph was a simple matter, but importing an animated model that XNA accepts and then making it animate was a different breed of problem entirely! Firstly it only recognizes .fbx and .x models at all, and secondly it wants pretty specific data included in the models - a skinning data tag, skeleton information and meshes with skinning information, and all of this needs to be XNA compatible. From the free model repositories available online (TurboSquid etc) none of their .fbx animated models worked.

12 Markers, more models

At the moment there are 12 built in marker arrays that ALVAR will happily accept, but of course it would be beneficial to have a lot more than 12 models available for the AR demonstration.

Toby suggested the idea of having sets of 12 models that could be switched out for other sets of models on the fly, all activated by a GUI system. After some investigation, I found that this idea works fine.

Nodes on the scene graph can be enabled or disabled at will. I realised this due to a functionality built in to the current AR program where pressing the space bar disables all models (so all you see are marker cards that don't produce any AR media). After studying the code I found it uses a simple call to accomplish this:
scene.RootNode.Enabled = false;

Sure enough, any node can be enabled or disabled, so revision one of the attempt to enable multiple model sets is as follows: during the addDemo methods, attach multiple demos to the same MarkerNode, but only have one demo activated at one time. The rest should be disabled. Then when the program is running switch between which demo is active, for each MarkerNode. The following diagram illustrates the concept:
How to use multiple sets of demos for each Marker Node

So to implement the model set switching code I added a few new variables. Firstly every addDemo method uses a placer TransformNode that does nothing but act as a dummy node to enable or disable the entire demo. All nodes that describe a demo are children of this placer node and this placer node connects to the corresponding MarkerNode.

These placer nodes are held in arrays modelSet1Nodes and modelSet2Nodes etc (each hold placer nodes for a set of models, that we will switch between). Now enabling one set is as simple as iterating and disabling the nodes in the arrays of sets we don't want, and enabling all nodes in the array of the set we do want.

Right, now to populate this stuff with models! Stay tuned.

Monday 17 June 2013

Day 6: Adding objects

Procedure to add object models

  1. Download .fbx file (these tend to work seamlessly with XNA), mine was called Diskette.fbx (it's a real doozy)
  2. Update configs and markers: two things, make an ALVARConfig.txt matching your marker card; and update config.txt to map the model to the marker (so XNA knows which marker card applies to which model). For this example I reused ALVARConfig7.txt, it can be used as is so all I did renaming the line inside config.txt to say "diskette" and not "gingerbread". See below for details.
  3. Import the model and all its dependencies into AR program (LowryDemo): in Visual C# 2008, within Solution Explorer window (right hand side), right click Content -> add -> existing item, browse to your .fbx. Now you can reference the model within the code. Don't forget to repeat this step to add textures jpgs etc that came with it too!
  4. Update global variables to initialize a MarkerNode variable you will use for your demo.
  5. Create a method to add your model: add[modelname]demo (see below for details of this method)
  6. Add call to your addDemo method from step 4, into createObjects() method

Notes on Step 2: How to update configs


ALVARConfig.txt

Typically looks like this:
Sample ALVARConfig.txt file
Each ALVARConfig refers to a marker card. The first line is the number of markers on your marker card and the 4 numbers below tell ALVAR which markers they are. The third set of numbers (four of them again) represent the ratio of sizes of the markers. The bottom bunch of numbers are for scaling, but don't worry about them - the same values can be reused in all your ALVARConfigs.

Config.txt layout

Sample config.txt file
The first three numbers represent the camera settings. The framerate (15 in this case), X resolution, and Y resolution (so here the resolution would be standard 720p, aka 960x720). Every line apart from these three is a mapping of an ALVARConfig file to a model name - assigning marker cards to models. You can then reference the model-marker pair via the model name when setting up markers.

Step 4: Making a global MarkerNode variable for your demo

Edit the existing line to include a MarkerNode of your own:
MarkerNode sofaMarkerNode, dragonMarkerNode, ... , disketteMarkerNode;

Remember what you called it, it will be used in the addDemo method below (step 5)

Step 5: Method addDemo

Every demo needs a method that adds it to the scene graph. All these methods are called in turn from within the CreateObjects() method. Here I'll explain how to make an addDemo method for your chosen model demo.

The aim is to make appropriate nodes and add them to the scene graph. You'll have a marker node on top, and some geometry and transform nodes below.
  1. Initialize marker node. This code is identical for any demo, can copy-paste and change the name of the variable.
  2. Add marker node to scene graph. Remember the marker node is always at the top of the nodes for a single demo (model transform and geometry nodes all fall under a single marker node, for each and every demo)
  3. Make geometry and transform nodes to manage the models in the demo
  4. Add geometry and transform nodes to the scene graph under the marker node, in whichever order gives the desired result.
Here's how its done:

Initialize marker node and add to scene graph (steps 1 and 2)

If you recall the global MarkerNode variable for our demo has already been initalized, so we assign it here. Similar code can be reused for every demo.
        private void addDisketteDemo()
        {
            int[] ids = new int[4];
            for (int i = 0; i < ids.Length; i++)
                ids[i] = i;
            modelConfig _modelConfig = new modelConfig();
            for (int i = 0; i < modelConfigArray.Length; i++)
            {
                if (modelConfigArray[i].name == "diskette")
                    _modelConfig = modelConfigArray[i];
            }
            if (_modelConfig.isMarkerArray)
            {
                disketteMarkerNode = new MarkerNode(scene.MarkerTracker, _modelConfig.markerAddress, ids);
            }
            else
            {
                disketteMarkerNode = new MarkerNode(scene.MarkerTracker, _modelConfig.markerNumber);
            }
            scene.RootNode.AddChild(disketteMarkerNode);

The string within the if statement of the second for loop is important:
               if (modelConfigArray[i].name == "diskette")
Here, the string must be the same as the name given in the config.txt file that links the demo to the marker array, i.e. a line similar to:
diskette,1,ALVARConfig7.txt

Geometry and Transform nodes (steps 3 and 4)

A geometry node basically holds a model itself, and some information pertaining to it. You load the model into XNA via a ModelLoader object, than assign it to a geometry node as such:
            ModelLoader loader = new ModelLoader();
            Model diskette = (Model)loader.Load("", "diskette");
            GeometryNode diskettenode = new GeometryNode("diskette");
            diskettenode.Model = diskette;
            diskette.UseInternalMaterials = true;
            diskette.CastShadows = true;
            diskette.ReceiveShadows = true;

The features UseInternalMaterials, CastShadows and ReceiveShadows can be set as desired.

Transform nodes are similar, but obviously you don't need to load a model:
            TransformNode mosiTrans = new TransformNode();
            mosiTrans.Scale = new Vector3(0.001f * _modelConfig.scale,
                                          0.001f * _modelConfig.scale,
                                          0.001f * _modelConfig.scale);
            //mosiTrans.Translation = new Vector3(0, 100, 0);
            mosiTrans.Rotation = Quaternion.CreateFromAxisAngle(new Vector3(1, 0, 0),
                                                                MathHelper.ToRadians(-90));

            disketteMarkerNode.AddChild(mosiTrans);
            mosiTrans.AddChild(diskettenode);
        }

The TransformNode object has methods Scale(Vector3), Translation(Vector3) and Rotation(Quaternion).

The final two lines add the new nodes to the scene graph where they need to be .

Note on textures

All textures must be in dimensions that are multiples of four, and dependent on your graphics card they may need to be powers of two. The error that pops up starts:
Invalid texture. Face 0 is sized (x by y)...

Making new markers to add more models

Currently we can have up to 12 marker arrays. 8 are in use so far, the other 4 can be printed out and assigned to models as and when required. Files ALVARArrayx.gif (where x =  nothing, or 2 - 12) hold the marker images to be printed.

Adding markers

The following has been taken from the ALVAR documentation, and describes how to generate sample markers for use with some sample programs:
Stuff about generating new markers
As and when we need more marker arrays (e.g. when we want over 12 objects simultaneously), this should be worth looking into.

My first new static model :-)

Trawling the net for models turned up a good 'un

Dynamic models, manual and inbuilt animation

The procedure for using animated models and animating them is similar to dealing with static models, but there are some differences: you use an AnimatedModelLoader instead of a ModelLoader, and you require some extra steps to perform the actual animation.

Note there are two types of animations, some models have their own animations inbuilt, and they may for example come with a skinningdata tag. The other type of animation is where you cause models to move about or update themselves by growing/shrinking etc manually by using the scene graph (e.g. use a TransformNode that is updated in the draw method). This second type of animation can be done to any model, static or otherwise, and is entirely dependent on the scene graph you craft.

The entire procedure is as follows (changes highlighted in red):

  1. Manage configs and markers as before, import the new model into Content as before
  2. If your has an inbuilt animation and Skinningdata: right click on the newly added model under Content, -> click properties, under Content Processor change to SkinnedModelProcessor.
  3. Initialize a global MarkerNode variable as before, but (if you want to manually animate a model) also initialize a global TransformNode, and/or (if your model has an inbuilt animation) initialize a global AnimatedModel variable.
  4. Create addDemo, but (if your model has an inbuilt animationusing AnimatedModelLoader instead of ModelLoader
  5. Add call to your addDemo inside CreateObjects() as before.
As mentioned, an inbuilt animation makes the model do stuff. This will result in a model animating in one place. And if we want to manually animate a model so that it moves across and about the view, we can use the scene graph (a TransformNode that is updated on every frame to make the model look like it's moving).

In theory this will work, at the moment I downloaded an animated model and tried to load its animations but I'm getting a Skinningdata tag not found exception that keeps crashing the program. Either I haven't found a model that has skinningdata yet or something is seriously wrong!

Investigations will continue tomorrow

Friday 14 June 2013

Day 5: Demoing the demo

The details of Augmented Reality with Goblin XNA

Met today with the famed Andy Wise, wonderful chap, gave a great demo of the system going through the code explaining how it all works.

ALVAR config files, models, marker panels

ALVAR is a software library that requires OpenCV, and in our AR demo is being used to handle all the marker generation and recognition stuff. It performs the recognition via an OpenCV-based edge detection algorithm. The fact that it uses edge detection solely rather than tracking salient points has interesting effects on the end result as will be discussed further down

Each physical marker panel has a corresponding ALVAR config file which contains info on which markers correspond to which panel, a ratio of sizes, and scaling info about the actual model assigned to that panel.

A central config.txt file contains some info about the camera: Framerate, X resolution, Y resolution, then a bunch of lines binding models to the corresponding ALVAR config files.

Terrible representation of how models and markers and marker panels and ALVAR config files and the central config file all correspond to each other
Because the main program is in XNA written in C#, and ALVAR is OpenCV-based and written in C, a marker detector wrapper bridges the gap for us.

GoblinXNA is an XNA wrapper for AR, written by a University in the USA. In terms of the power of its graphics its pretty simplistic, but is fantastic at handling scene graphs - the key point of our AR implementation.

Main code for the AR demo program is in game1.cs

Scene graphs

This is my attempt at explaining the fascination that is the scene graph, prepare yourselves.

Behold! The scene graph


A scene graph is a data structure that arranges the logical representation of a scene. With XNA it is in fact a tree layout although we still call it a graph. Basically nodes represent stuff in the scene, and the main rule is that the effect of a parent is applied to all its child nodes. So in order to draw something the system calculates the ultimate combination of effects of child nodes by iterating down the tree. For example in the above image of an example of part of a simple scene graph, in order to draw the scene the system follow its child nodes to "camera", to "light source", and to "transform" and it deals with them all before the scene can be drawn. "Transform" further iterates down to the model and to another transform, which affects a few more models. In this hierarchical structure, changing the upper transform affects all three models, whereas changing the lower transform only affects its direct children models.

Using a scene graph, one can get up to all sorts of cool stuff. For example deferred rendering: things further down the graph get rendered later on, put global light sources at the top to be sorted out quickly, but if you have millions of little lights that affect small parts of the scene you can stick them all at the bottom of the scene graph along with the models they affect - this leads to faster rendering of a huge number of light sources.

Code itself

Initialize method creates the scene, CreateLights method makes the two global lights, setupMarker etc messes about with ALVAR.

The hierarchy of marker nodes and their models in the scene graph is as follows: 
Marker nodes and the models, part of the scene graph
The marker node is at the top, the transform node positions the model (in the nodes below) relative to the marker node. Now as the scene is drawn, moving the marker node causes the geometry to follow suit and thereafter the transform node affects the result. All due to the scene graph hierarchy. You can have any number of lights, transform nodes and geometry nodes under the marker node.

To implement dynamic models, on every cycle of the scene just edit the models transform nodes.

Quaternion is a format of rotation, where 6 degrees of freedom can be expressed in only 4 numbers.

Render cycle is as follows: Run initiate, run update, run draw then it loops the update and draw methods. Update will execute on every tick regardless, whereas draw will only actually execute in the render cycle if the graphics card is ready - no double buffering.

Models in .fbx tend to import well. Click content -> add, and select a model. Many free online repositories.

With AR the complex part is the tracking of the marker nodes. Everything else like the scene graph needs to be simple to do, which is what XNA provides. To port the code to Mac I need to get ALVAR working on Mac, but its a .dll so that poses a problem. Will need to research this to see if anyone else has ported it!

AnimatedModel.cs contains code that loads animated models, pretty simplistic.

If you wanted to rewrite the AR demo:
  1. Would need to consider the graphics engine, e.g. Unity, UDK (Unreal Engine), Cryengine. Current engine is XNA, gives all the model loading, sound support, lights, effects, full scenes and all that.
  2. Would need to write a marker tracker that integrates into the engine - at the very least, just stick the tracking code in the "Update" part of whatever engine it is. Grab an x,y of where the marker currently is, and process stuff based on that.
Limiting factors of the AR demo:
  • Changing graphics card, drivers etc
  • CPU speed makes the most difference when considering the actual tracking
  • Framerate of the camera - this is also the reason the graphics card performance itself is not a limiting factor! Max speed of marker before tracking stops
Framerate is interesting, the current 15FPS means that at a certain speed of moving a marker card about, the camera can't provide a clear enough image for the program to track markers, due to motion blur. This is an issue when you detect edges, but other techniques such as optical flow tracking (aka SLAM - Simultaneous Localisation And Mapping) assumes the camera itself is moving and instead tracks salient features. This allows it to be robust to temporary motion blur because it doesn't simply try and detect the markers afresh in every single frame, rather tracks the motion of certain points - e.g. the corners of the markers. Those are much easier to keep track of even under blur because the effect of them is larger scale.
  • Resolution - opposite of framerate. How far back the marker can be from the camera, before tracking stops. But if it's further back the motion blur due to the framerate decreases at the same time, increasing robustness to speed. Need to balance resolution and framerate!
If we were to change the camera, would need one that has on board processing rather than offloading compression of the captured video onto the CPU. If we tried 1080p video without on board processing, the processor would be under very heavy load just compressing every frame constantly, XNA can't handle that much data.

New TV, Repositories, and Investigating Windows Laptop part 3

Tested out the new 42" TV that arrived yesterday, all works well and good. A pretty advanced bit of machinery, for reasons unbeknownst to me it comes equipped with an ethernet port no less!

In terms of setting up a git or mercurial repository for the project, I'll likely need some method of private repository so that we can have an updated version of the XNA code in a single place, whilst adhering to the University's privacy policies. It will need to handle multiple versions of the code, namely for Windows and Mac.

Further debugged the Acer Windows laptop that wasn't running the AR demo with the help of Andy. The silent crashes I have been experiencing apparently indicate one of two things:
  1. A problem with the graphics drivers, or
  2. A problem with the camera
Seeing as the laptop sports terrible Intel GMA 4500MHD integrated graphics, the graphics drivers may well be a factor and if this is the case the new laptop should have either a newer Ivy Bridge Intel HD3000 chip, or HD4000 from Haswell. Unfortunately neither option comes cheap in notebooks. Alternatively any dedicated chip from AMD or Nvidia, or even an AMD APU is likely to work - but in all cases you can never know until you try.

Before going the route of a more graphically advanced laptop though, the webcam must be freed of doubt. The Acer laptop has an in-built camera (as well as the attached external webcam we usually use for AR) so there may be a mixup between the two: the current code utilises webcam "0" and sets it up at a framerate of 15 frames a second and a resolution of 800 x 600. If that is referencing the internal camera we don't know if it can handle that framerate. The external webcam definitely works with those settings, so we need to ensure the code is calling the external webcam and not the internal one.
Possible fixes: 
  • Change the camera reference in the code from"0" to something that points at the external cam
  • Change the settings to a framerate and resolution the internal camera supports
  • Uninstall the internal camera completely to ensure the code can only be referencing the external one
These shall be investigated next time.

Another possibility is dll's expiring themselves - ALVAR particularly is under suspicion. Although in this case I have already reinstalled ALVAR so it probably isn't the problem here.


Now I just need to add some new dynamic and static models to the system well before next Friday!

Thursday 13 June 2013

Day 4: Downpour

British weather indeed, got caught in an unexpected downpour that soaked me through on the way out for lunch today - had to stop off home and ended up spending the rest of the afternoon working from the comfort of my house.

Google Glass and Canon's MReal

Further research into state of the art AR technology unearthed an obvious candidate: Google Glass, the futuristic pair of sleek glasses with much gadgetry spirited inside. "Much gadgetry" meaning a 640x360 display that appears to the upper right of your eyes, a 5MP 720p video recording camera, 16GB of flash memory, bluetooth and wifi but no GPS. You control the device with voice commands and a touchpad on the arm piece (which rests to the side of your head).

Glassy
The augmented reality of this thing is limited (because the display itself is tiny and at the corner of vision out of the way rather than being superimposed over your entire view) and at the moment functions include recording videos and doing stuff smartphones usually do - but there are various possibilities. Since the camera sees what you see, the display can bring up facts about the tourist attractions you are looking at. It can suggest nearby points of interest and intuitively direct you to them (although with no GPS it may be a little rough), and bring up standard heads-up information and statistics.

Another AR system recently released in the US, is Canon's MReal. It is much more practical in the augmented reality department seeing as the video overlay covers your entire view, and much less practical in the price department because it costs $125,000... Oh, and $25,000 a year for maintenance.


Welcome back, anyway it's purpose is in fact to bring Augmented Reality to enterprises, research universities, and industry - for which it holds promising abilities.

Standard issue X-Wing fighter headwear


The main attraction of these head-mounted augmented reality systems is to provide a user the ability to interact with 3D models in the real world, in an intuitive and engaging manner, as demonstrated by Scope Technologies in the following YouTube video:

Scope Technologies Augmented Reality Training Pump Demo

(So people doing complicated jobs can get superimposed 3D imagery to instruct them in their arcane practices)

More interesting to this blog are the AR techniques that have been demonstrated by these systems:

  • Measuring the distance of the viewer's head from the model in question and increasing texture detail when they move in for a closer look
  • Superimposing instructions on how to operate and repair machinery
  • A box covered inside and out with marker codes opens to reveal a bouquet of flowers, and tapping different marker codes changes their colour as a bee buzzes around. You can open and close the box and move it about and the graphics match up smoothly.
  • Museum demo: wall and tables covered in codes becomes a Jurassic landscape in which you can walk about. A Dinosaur wonders about your feet and giant predators lumber off in the distance.

Windows laptop that can run the Augmented Reality Demo, part 2

When the AR demo had been run (or attempted to be run) on the laptop previously it provided a useful error message explaining that there was not enough "something" (which may have been graphics memory, or perhaps some other resource), in which case speccing a new laptop that overcomes that issue is simple. Unfortunately as mentioned yesterday attempting to run the AR demo software nowadays results in it silently closing without any indication of why it hasn't run. So I set about reinstalling the whole thing.

Installed the webcam drivers and tested the webcam to ensure it was properly working and recognized (an attached webcam is the only requirement of the AR demo program).

Repaired all the relevant existing software (XNA, Alvar toolkit, OpenCV, etc) to see if that made a difference (it didn't).

Tried debugging the source files in VisualStudio. Didn't turn up any issues, it builds and runs apparently fine (no errors, but one warning about a lock - I'll add details here when I get back to the laptop).

Tried remaking the AR Demo executable from the source code. Packaged and published the source project from VisualStudio but the resulting file still did not work (it keeps silent closing no matter what I try).

It is possible the source code has been accidentally modified or some of it is missing, tomorrow I'll try restoring the source code from the drop box files and reinstalling it again. And I should also check with Toby  that I'm installing this right. Which reminds me, I'm going to be meeting with Andy tomorrow! Should have a nice explanation of the source code from him which will likely help out in this task, so I'm looking forward to it.

Porting the AR demo to Mac

The current AR demo program was written in XNA, which is currently Windows exclusive. However, an open source project called MonoGame allows you to develop XNA code on other platforms via a cross platform IDE called MonoDevelop. A blog post pointed out by Toby details how to set this up on a Macbook Pro.

I followed the instructions and fully installed MonoDevelop and MonoGame. At the moment I can write a sample XNA program, but it is failing to build with several error messages all saying "xxx has already been defined". I presume I need to mess about with the references a little, hopefully that will fix it and let me write a simple XNA application. If it succeeds I can move on to the actual porting of the AR demo code.

More tomorrow!

Wednesday 12 June 2013

Day 3: ... and Walter

Andy

Andrew Wise is the original creator of the Augmented Reality demo, and I'll be meeting with him on Friday so he can show me the ropes and explain how to go about adding new models to the current system (which needs to be done in time for Animation 13 in early July!).

We know Andy documented some of the AR work (which would be very useful to see!) but so far we haven't been able to find it on the machines that currently have the AR Demo installed. The search continues.

Toby provided a copy of Andy's research paper (describing the AR project no less), as well as a guide to XNA (software package used by the AR demo), so I will have some interesting background reading to do tonight!

Donald and Walter

Specced up a new motherboard, CPU and RAM for Donald, then had a quick look at Walter to see if it would take the same upgrades - was subsequently surprised by the decent hardware hidden in there! Where Donald was kitted with an nforce 650 motherboard, slower 800MHz RAM, a simple Thermaltake cooler and an OCZ Stealth Extreme PSU (mid range parts in all); Walter sported a full-on Core 2 Quad Q9400, 4GB of Dominator 1066MHz RAM, a Corsair HX620 modular PSU (!), a superfancy Zalman Cooler (see pic below), all bolted onto a Biostar TPower I45! Legendary overclocking capability and pretty strong performance even today.

Walter had one of these devices keeping a Q9400 at 24 degrees C idle!
So Walter won't be getting the upgrade treatment (need to get your money's worth for them there components).

There were also some suspicions about Donald's GPU being the problem (Donald and Walter had been upgraded with identical cutting edge Asus GTX560 Ti DirectCU II cards somewhat recently). I swapped the cards around but both worked perfectly fine in Walter, even under intense load for extended periods of time (Unigine Heaven benchmark) where they performed as expected and temps topped out at a cool 60 degrees. Of course, neither card worked in Donald.

While I was there with a screwdriver to hand I also took out all of the PCI devices, USB devices, USB firewire and audio plugs from the mobo, all drives, everything except the essentials (CPU, one stick of ram in slot 1, the GPU, the PSU) and tried starting Donald after resetting the CMOS. No luck though, Donald was as obnoxious as usual - fans spinning, lights on, nothing else happens.

Windows laptop that can run the Augmented Reality Demo

I set about investigating an old Acer laptop that was crashing whenever we attempted to run the AR demo, in order to determine the problem and possibly spec a new suitable Windows laptop that can actually run the demo. There's one major rule: said laptop needs to be cost-effective!

The acer has a core 2 duo 2GHz processor (adequate) and Intel GMA 4500MHD integrated graphics (terrible), and is running Windows 7.

Symptoms: When AR software is executed, nothing happens.
If no webcam is attached to the laptop, it crashes with a "forced to close" error message. If webcam and external TV are correctly attached and set up as required, nothing happens when the AR demo is run. A look inside task manager shows the process starts up, uses the CPU a bit, then terminates itself silently.

As of now it is not clear why the software isn't running. There are a few possibilities:
  1. The integrated graphics are unsuitable
  2. The software wasn't installed properly
  3. Some other error
The reasoning for 1 as far as I know is the fact that every other computer that has run the AR demo has had an Nvidia graphics card installed in it (Walter has a GTX560 and the AIG lab win XP PC has an 8800GTX), so that may be a factor. In that case the new laptop will need some form of Nvidia dedicated graphics. Unfortunately this may inflate the price as cheap entry level notebooks tend to have integrated graphics as a rule (which, put simply, is why they are cheap). I am not definite the graphics is actually the issue (as the laptop runs many other XNA demo applications just fine, only not the Augmented Reality one), perhaps Toby and Andy can advise on this.

There is always the possibility that the problem is number 2, but that can be ruled out by simply reinstalling the AR demo, and the component software (XNA etc) on the Acer laptop. I don't know how to do that as of yet (I need to ask Toby/Andy).

If the problem is not related to the specs of the Acer laptop or the software installation, then we may be wasting our time with a new laptop, so it will be essential to determine this before hand.

Testing cutting edge AR software on a Macbook Pro

I also began installing some of the AR toolkits and software components from the AR survey (that is still underway here), just to have a play with them on the Macbook graciously provided for my use by Toby. Installed Qualcomm Vuforia so far (one of the most popular SDKs for Augmented Reality, works with Android, iOS and Unity dev tools). Eclipse, the Android SDK, the Android developer toolkit (which are requirements for Android-Vuforia development) and the Vuforia SDK itself have all been installed on the Mac, but I have yet to actually try out a test app. This should be an interesting foray into mobile Augmented Reality (another of the tasks set out for this summer project).

Cheaper robust marker cards

During my survey of the cutting edge AR systems, I came across a website selling marker cards from Japan: http://nyatla.jp/nyartoolkit/wp/

The price is (I think) 620JPY a card, and apparently they have been tested for durability against water and dirt (but seemingly not against schoolkids), although with the entire website in Japanese it is somewhat difficult to extract information via Google Translate.

It looks like there are some packs available: 980 Yen (inc postage and tax) for 5 sets of 10 piece marker cards, apparently designed for teaching in a classroom environment.

The translation continues!


Tuesday 11 June 2013

Day 2: Donald the PC

Tour!

Today we got into the swing of things

Had a quick tour of a few secret rooms and saw all sorts of gadgetry. Met two newly delivered industrial quality flight cases to carry AR stuff about the School without it breaking (2013's version of the cardboard box), and a TV that randomly invented its own remote controller events. That, or someone was hiding inside one of the flight cases with a spare remote playing a suspicious prank..

Industrial quality flight case. Pretty smooth wheels

Saw the original Augmented Reality system in action, noting the need for more robust marker cards. The current marker cards consist of printed codes on an A4 sheet of paper attached to plastic boards. Printing directly to the boards is very costly, so some innovation will be required here (one of the later tasks).

The current system is actually pretty smooth:
A webcam supplies a video feed that is passed through the AR program and the result is displayed on a large LCD screen. Special physical marker cards are recognised by the program, and it overlays 3D models when and where it recognises one of them. So you stick a marker card into the camera view and see interesting 3D stuff appearing on the screen within the real world video feed! The result is impressively smooth, with some  excessively detailed models.

Donald

The rest of the afternoon was spent troubleshooting Donald, a pretty enthusiast level PC from yesteryear that got tired of booting. Surprisingly the hardware was decent, nforce 650i chipset, Asus GTX560 TI DCUII, OCZ PSU, fancy CPU cooler, OCZ RAM, and all inside an Antec 900. Sort of machine that belongs in a gamers cave rather than in a university! Or at least if it was the year 2008, everything apart from the GPU is a bit old in the tooth.

Troubleshooting notes

Symptoms: lights on graphics card, motherboard and case all light up, all the fans start spinning, but nothing appears on the screen. The mouse or keyboard don't get any juice (no scroll lock caps lock lights work, and the optical sensor on the mouse doesn't light up).

Tried resetting the bios and disconnecting every addon that didn't need a screwdriver (sata devices etc). Removed the single/dual SLI selector, removed the reset switch pins coming from the case, still no difference at all. The motherboard doesn't even get to the self-test - removed the RAM and restarted and it made zero difference, no warning beeps or anything. Seems to all intents and purposes like a faulty motherboard.

Specced up a replacement motherboard CPU and RAM for Donald, a new lease of life for the ageing machine! A state-of-the-art AMD FX 6300 (6 cores) CPU, 8GB of DDR3 ram and a 970X chipset motherboard should provide future-proof performance that matches the current graphics card well. All for £225 from Scan.co.uk.

If this were my machine the next potential upgrade would be an SSD, but that's overkill for the kind of use Donald will see.

Monday 10 June 2013

Day 1: Research into Augmented Reality Systems

Introduction

This blog will primarily be used to keep track of the progress of my summer vacation project at the University of Manchester, involving updating the Augmented Reality Exhibit.

Augmented Reality involves combining a real world view with a virtual scene generated by a computer, augmented with additional information such as sound, video or graphics. This video illustrates the concept:


The Augmented Reality Exhibit at the University of Manchester was initially implemented by Andy Wise in 2010 and now needs updating with new models, better graphics, and a new printing of the black-and-white marker cards on robust materials.

The project itself will firstly involve understanding and documenting the current system, and then updating it with better graphics, models and incorporating sound as required. It will also involve looking at packaging the system more effectively and porting it to Mac/Linux

Research into Augmented Reality Systems

So initially, I will be doing some research aiming to list the latest toolkits/components/complete systems that are being used for augmented reality.

This spreadsheet summarises the findings so far.